Netcomm NL19ACV Configuration Guide
There are two main ways to configure the Netcomm NL19ACV modem:
- Connect via NBN with optional 4G Backup
- Connect via 4G Only
Configuring for FTTP, HFC, FTTC, NBN Wireless
Step 1: Power on the modem.
Step 2: Logging into the Web Interface
- Connect your computer to the Netcomm via an Ethernet Cable.
- Open a web browser and type http://192.168.20.1 into the address bar and press Enter.
- When prompted for authentication, type admin into the Username field.
- The password is printed on the back of the modem. This will be either admin OR the serial number of the modem.
- Click OK to log in.
Step 3: Click Basic Setup.
Step 4: Select Ethernet WAN.
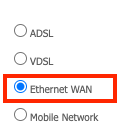
Step 5: Click Next.
Step 6: Select PPP Over Ethernet (PPPoE).
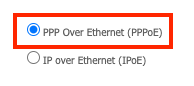
Step 7: Click Next.
Step 8: Select No VLAN Tag.
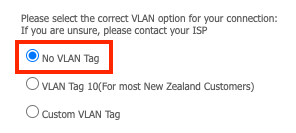
Step 9: Click Next.
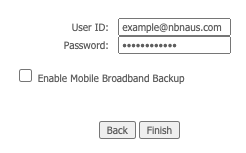
Step 10: Enter your username and password as provided.
Tip
Note: If you wish to enable the 4G Backup option, click Enable Mobile Broadband Backup. Leave 'Network Name', 'Username', and 'Password' blank.
Step 11: Click Finish.
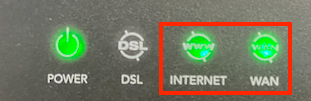
Step 12: Allow up to 10 minutes for the connection to come online. Once completed, you will see the WAN and Internet lights come online.
You are now connected to the Internet.
Configuring for NBN FTTN, FTTB
Step 1: Power on the modem.
Step 2: Logging into the Web Interface
- Connect your computer to the Netcomm via an Ethernet Cable.
- Open a web browser and type http://192.168.20.1 into the address bar and press Enter.
- When prompted for authentication, type admin into the Username field.
- The password is printed on the back of the modem. This will be either admin OR the serial number of the modem.
- Click OK to log in.
Step 3: Click Basic Setup.
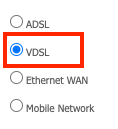
Step 4: Select VDSL.
Step 5: Click Next.
Step 6: Select PPP Over Ethernet (PPPoE).
Step 7: Click Next.
Step 8: Select No VLAN Tag.
Step 9: Click Next.
Step 10: Enter your username and password as provided.
Tip
Note: If you wish to enable the 4G Backup option, click Enable Mobile Broadband Backup. Leave 'Network Name', 'Username', and 'Password' blank.
Step 11: Click Finish.
Step 12: Allow up to 10 minutes for the connection to come online. Once completed, you will see the DSL and Internet lights come online.
You are now connected to the Internet.
Adding 4G Backup to an Existing Connection
Tip
If you have an existing modem configured with NBN, you can enable the 4G backup without resetting your modem.
Step 1: Power off the modem.
Step 2: Insert the SIM until it clicks into place.
Step 3: Ensure that the two large antennas have been screwed into position on the back of the modem.
Step 4: Power on the modem.
Step 5: Logging into the Web Interface
- Connect your computer to the Netcomm via an Ethernet Cable.
- Open a web browser and type http://192.168.20.1 into the address bar and press Enter.
- When prompted for authentication, type admin into the Username field.
- The password is printed on the back of the modem. This will be either admin OR the serial number of the modem.
- Click OK to log in.
Step 6: Click Advanced Setup.
Step 7: Click Mobile Broadband.
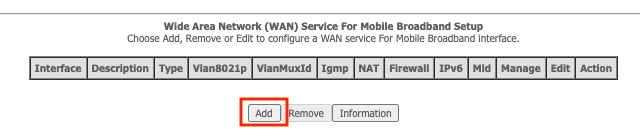
Step 8: Click Add.
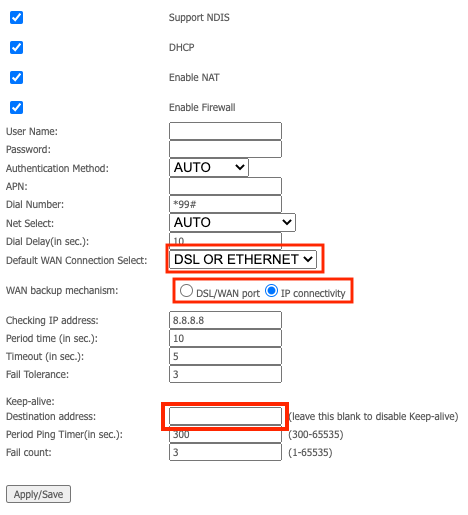
Step 9: Configure the following settings:
- Default WAN Connection: DSL OR ETHERNET
- WAN backup mechanism: IP Connectivity
- Keep-alive Destination address: Leave this blank.
Step 10: Click Apply/Save.
Your 4G Backup is now configured.
Tip
Note: The backup service can take up to 5 minutes to turn on if the NBN service goes offline.
Connect with 4G Only
Step 1: Power off the modem.
Step 2: Insert the SIM until it clicks into place.
Step 3: Ensure that the two large antennas have been screwed into position on the back of the modem.
Step 4: Power on the modem.
Step 5: Logging into the Web Interface
- Connect your computer to the Netcomm via an Ethernet Cable.
- Open a web browser and type http://192.168.20.1 into the address bar and press Enter.
- When prompted for authentication, type admin into the Username field.
- The password is printed on the back of the modem. This will be either admin OR the serial number of the modem.
- Click OK to log in.
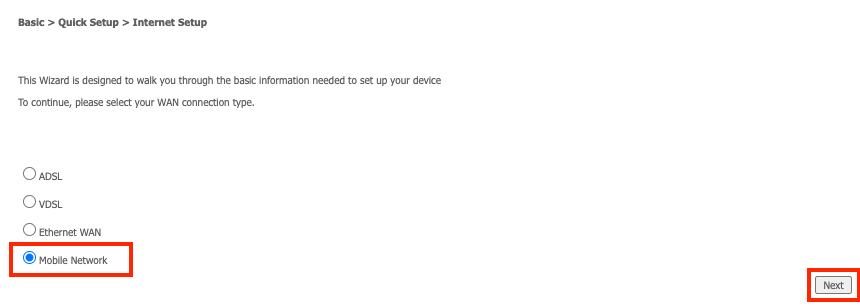
Step 6: Click Basic Setup.
Step 7: Select Mobile Network.
Step 8: Click Next.
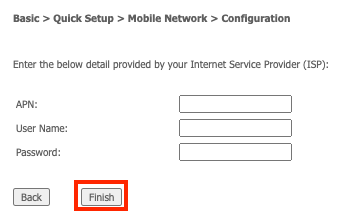
Step 9: Leave all three fields blank, then click Finish.
Step 10: Allow up to 10 minutes for the connection to come online. Once completed, you will see the LTE light come online.
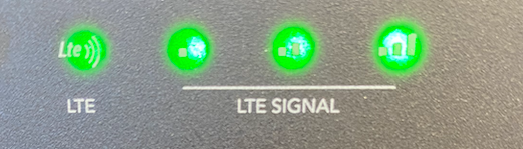
You are now connected to the Internet.