Netcomm NF18ACV Configuration Guide
This page will help you configure your Netcomm NF18ACV to work with your Cadiz3 provided Internet connection.
Netcomm Management Interface
Prerequisites:
- Netcomm NF18ACV, plugged in and powered on.
- Netcomm must be plugged into your computer with the provided Ethernet cable. (This cable must be plugged into one of the yellow LAN ports on the modem.)
Alternatively, you can use the provided WiFi details on the provided card to connect your computer wirelessly to the modem.
Tip
You can also find the default WiFi username/password on the bottom of the modem stand.
Please note that you may not have internet connection even after connecting to the modem if the modem has not been configured by Cadiz3.
All modems/routers sent from Cadiz3 are preconfigured to connect, and therefore you don’t need to reconfigure them.
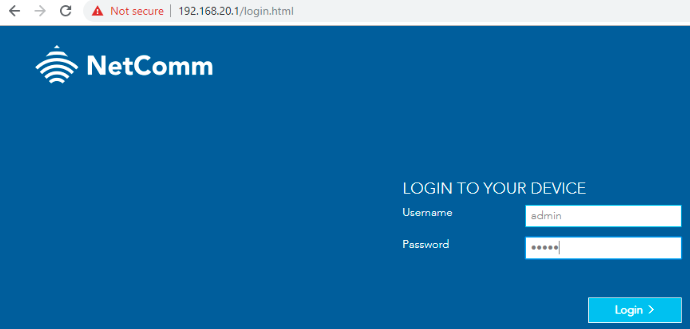
The default IP Address of the Netcomm NF18ACV is 192.168.20.1.
Open your web browser and type 192.168.20.1 in the address bar as shown in the image above.
The modem comes with the following default username & password:
- Username: admin
- Password: admin
Warning
It is highly recommended that you change this password!
Click Login.
Configuring for NBN FTTN
Prerequisites:
- Fibre to the Node NBN connection provided by Cadiz3.
- Netcomm NF18ACV
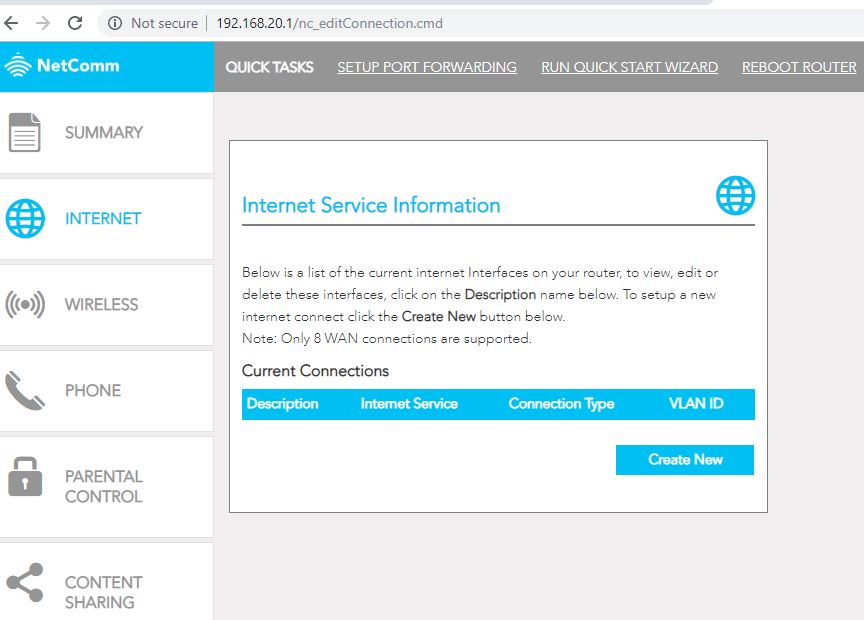
From the Netcomm homepage, click on Internet on the left-hand column and then click on Create New.
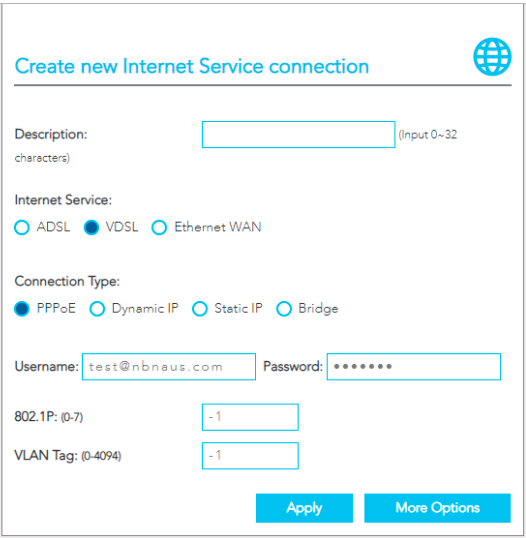
You will need to enter the following information:
- Description: This is for your reference only.
- Internet Service: Choose 'VDSL'.
- Connection Type: Choose 'PPPoE'.
- Username: Enter the username provided by Cadiz3.
- Password: Enter the password provided by Cadiz3.
- 802.1P: Leave unchanged at -1
- VLAN Tag: Leave unchanged at -1 (unless advised specifically by Cadiz3).
Tip
If you do not know your username & password, contact Cadiz3 at 1300 933 217.
Click Apply.
If everything has been plugged in correctly, you should have Internet access within 60 seconds.
You will see the DSL indicator light go solid on the modem, and the Internet light will follow shortly.
You are now connected to the Internet!
Configuring for NBN FTTP or HFC
Prerequisites:
- HFC or FTTP NBN connection provided by Cadiz3.
- Netcomm NF18ACV
From the Netcomm homepage, click on Internet on the left-hand column and then click on Create New.
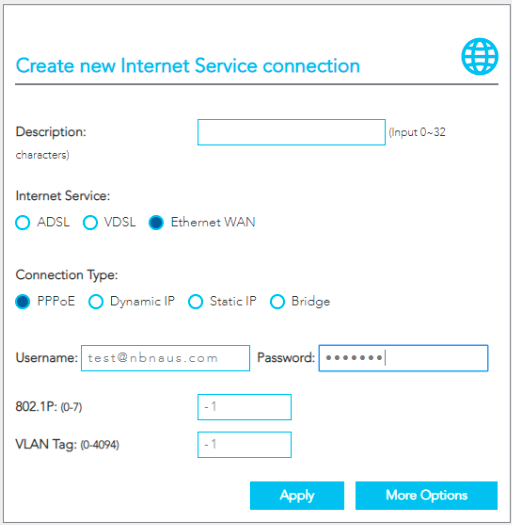
You will need to enter the following information:
- Description: This is for your reference only.
- Internet Service: Choose 'Ethernet WAN'.
- Connection Type: Choose 'PPPoE'.
- Username: Enter the username provided by Cadiz3.
- Password: Enter the password provided by Cadiz3.
- 802.1P: Leave unchanged at -1
- VLAN Tag: Leave unchanged at -1 (unless advised specifically by Cadiz3).
Tip
If you do not know your username & password, contact Cadiz3 at 1300 933 217.
Click Apply.
If everything has been plugged in correctly, you should have Internet access within 60 seconds.
You will see the indicator light go solid on the modem.
You are now connected to the Internet!
WiFi Settings
The Netcomm NF18ACV comes preconfigured with WiFi, and the default username/password can be found in the following locations:
- On the WiFi security card provided with the modem.
- On the bottom of the modem.
Warning
Note: If you have changed your WiFi name/password, this will no longer be correct.
Changing your WiFi Name & Password
Prerequisites:
- Netcomm NF18ACV
Log into the Netcomm Management Interface.

From the Netcomm homepage, select Wireless.
On this page, you will be able to change the Name and password for your WiFi connection.
Click Apply/Save when you are finished.
Changing Admin Credentials
Prerequisites:
- Netcomm NF18ACV
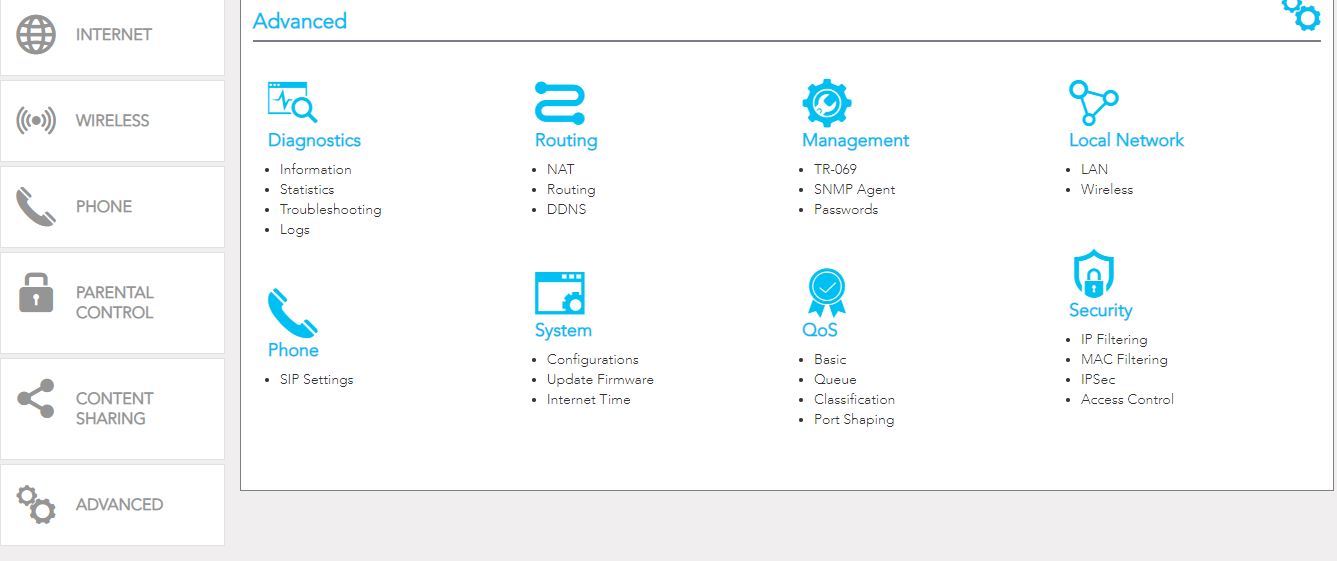
Log into the Netcomm Management Interface and select Passwords from the Management menu.
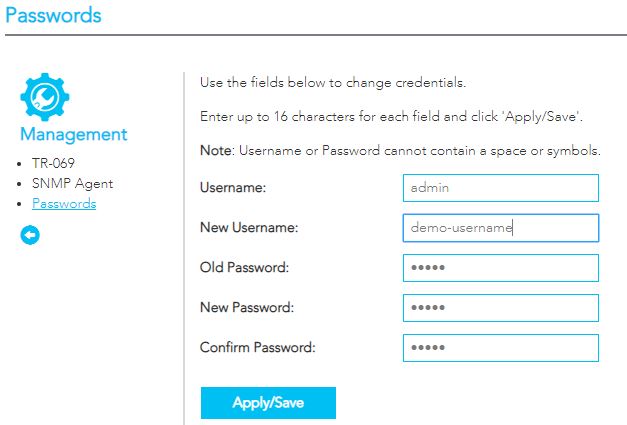
From this page, you can change your usernames & passwords that are used to log into the Netcomm Management Interface.
Tip
You will need to log in with the new username/password after you hit save.
Click Apply/Save when you are finished.